-40%
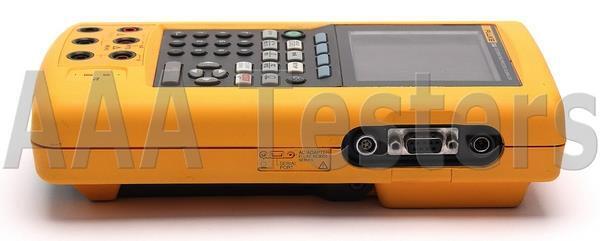
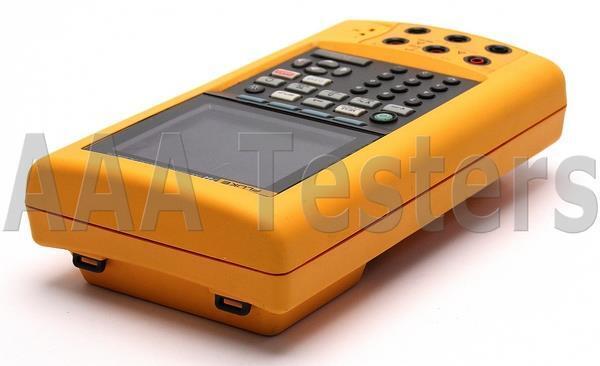
Fluke 744 Documenting Process Calibrator HART 275
$ 1224.43
- Description
- Size Guide
Description
ebay templateThe Following Items Are Included:
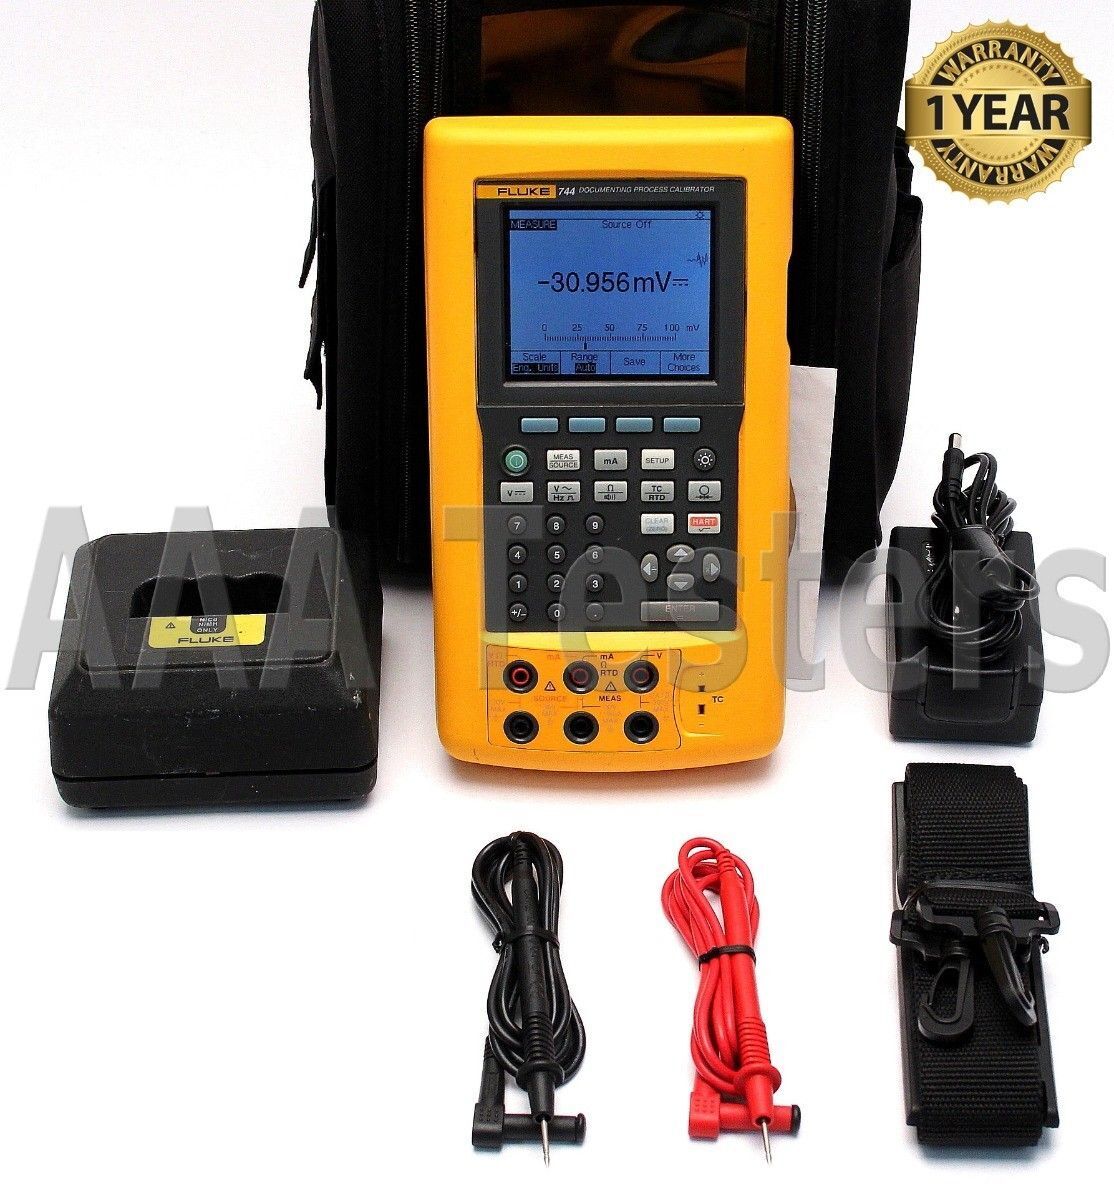
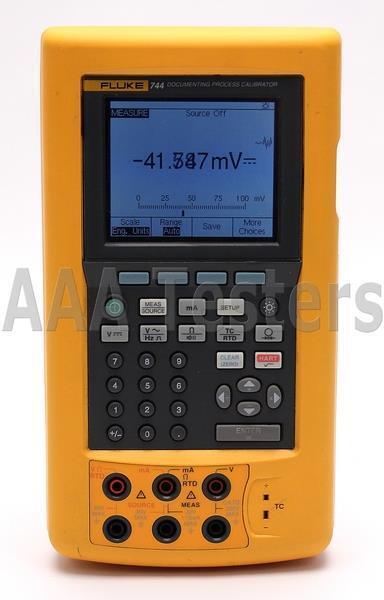
Fluke 744 Documenting Process Calibrator (BC# 42608-L/T*)
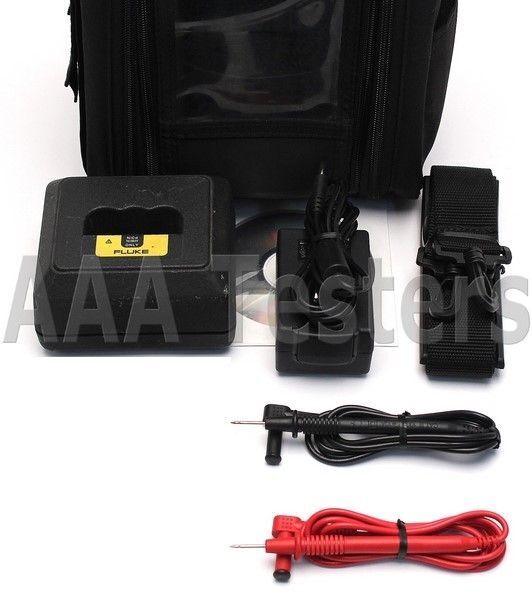
(2) 1000V Hard Point Test Leads
Fluke BC2717 Battery Charger
AC Adapter/Charger
User Manual On CD-ROM
Carrying Case w/ Strap
BE SURE TO CHECK OUR EBAY STORE FOR OTHER ITEMS!
This Item Has A Current Calibration!
Fluke 744 Documenting Process Calibrator - HART
Offers the communication capabilities of the 275 HART communicator!
Includes Carrying Case & Accessories As Listed Above!
Working Condition: Excellent
Condition: Refurbished
Calibrated: Yes
Warranty: 1 YEAR WARRANTY
As more and more process plants begin to take advantage of smart transmitters, the need for a new generation of calibrators has emerged-calibrators that can communicate via industry standard digital protocols. The 744 combines HART communication capability to deliver an integrated communicating calibrator. This rugged, reliable tool is ideal for calibrating, maintaining, and troubleshooting HART and other instrumentation.
The 744 does the work of several tools - sourcing, simulating and measuring pressure, temperature, and electrical signals in one rugged, hand-held device.
For documentation, the 744 automates calibration procedures and captures your data. And, of course, it helps you meet rigorous standards like ISO 9000, FDA, EPA and OSHA regulations.
The 744 is a power multifunction documenting calibrator that lets you download procedures, lists, and instructions created with software-or upload data for printing, archiving, and analysis. The 744 also features a powerful built in HART® interface capable of performing nearly all the day-to-day tasks you now perform with a separate communicator.
Features:
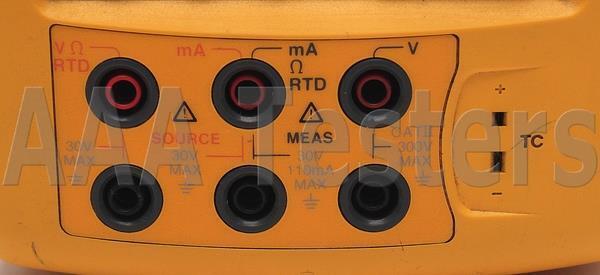
Measure volts, mA, RTDs, thermocouples, frequency, and ohms to test sensors, transmitters and other instruments
Source/simulate volts, mA, thermocouples, RTDs, frequency, ohms, and pressure to calibrate transmitters
Power transmitters during test using loop supply with simultaneous mA measurement
Measure/source pressure using any of 29 Fluke 700Pxx Pressure Modules
Create and run automated as-found/as-left procedures to satisfy quality programs or regulations. Record and document results
Holds up to a full week of downloaded procedures and calibration results.
Use many features like autostep, custom units, user entered values during test, one-point and two-point switch testing, square root DP flow testing, programmable measurement delay etc.
Easy to use
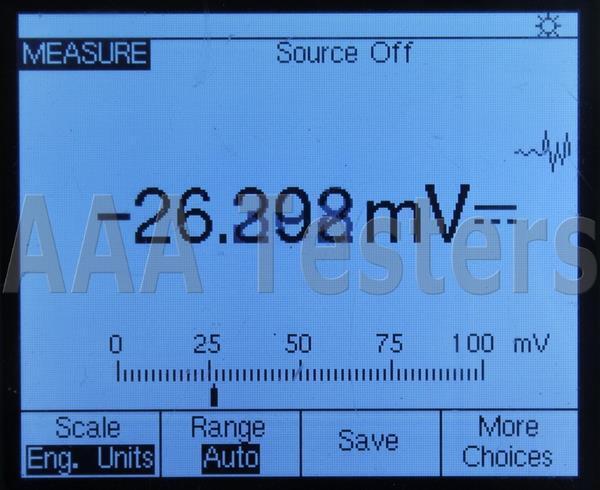
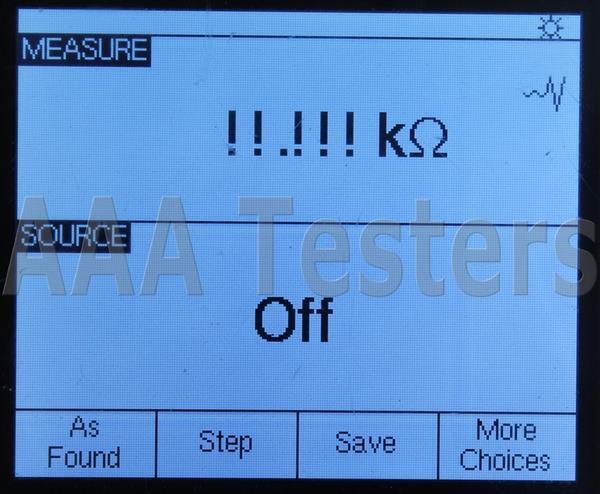
Bright white dual display. Read both sourced and measured parameters simultaneously.
Multi lingual interface
Rechargeable NiMH battery for 10 hour uninterrupted use. Includes gas gauge.
Handling of fast pulsed RTD transmitters and PLCs, with pulses as short as 1 ms.
Delivered with DPC/Track Sample software.
Compatible with many Asset Management software packages.
HART Capabilities
The 744 is designed to take on nearly all the day-to-day tasks you now perform with a separate communicator. In fact, it offers the communication capabilities of the 275 HART communicator.
Requires no external box or second tool for everyday HART calibration and maintenance.
Offers fast HART communication.
Supports popular models of HART transmitters, with more devise-specific command support than any other HART field calibrator.
Works with multiple masters, burst mode, and multi-drop configurations.
Is easy to update as additional instruments are added and new HART versions are released.
Interrogate to determine device type, manufacturer, model, tag.
Reconfigure the sensor mapping of dual sensor temperature transmitters.
Read HART PV function and smart transmitter digital output while measuring analog mA output.
Read and write HART configuration functions to make field adjustments to PV range points, damping, and other top-level configuration settings.
Re-label smart transmitters by reading and writing to the HART tag field.
The 744 supports the commands contained in HART protocol Version 5.7. With 2 MB of memory, the 744 supports a substantial set of HART instructions:
Universal commands provide functions that are implemented in all field devices, for example, read manufacturer and device type, read primary variable (PV), or read current output and percent of span.
Common practice commands provide functions that are common to many but not all field devices, for example read multiple variables, set damping time, or perform loop test.
Device-specific commands provide functions that are unique to a particular field device, for example sensor trim.
HART Operating Modes Supported
Point to Point operation , the most commonly used mode, connects the 744 to a single HART device in a 4-20 mA loop.
In Multi-Drop mode , several HART instruments can be bussed together. The 744 searches for each, identifies addresses in use, and allows you to select the instrument for calibration and related operations.
In Burst Mode, the HART instrument transmits bursts of data without waiting to be interrogated by a master unit. The 744 can take transmitters out of burst mode during test or calibration, then later restore them to burst mode.
744 V 2.5 Documenting Process Calibrator Software Upgrade
The Fluke 744 Version 2.5 software upgrade includes:
Device-specific calibration support for new instruments:
Micro Motion 2000, 2000 IS, 9701, 9712 and 9739 coriolis flow transmitters
Fuji FCX and FCXA2 pressure and FRC temperature transmitter
New features:
Support for New Hart Scientific dry blocks: 7103, 9007, 9011, 9023, 9103, 9105, 9107, 9122, 9127, 9132, 9133 and 9150
Enhanced dry block delay setting for temperature switch testing
Switch test without reset
The upgrade is delivered on a floppy disk. One upgrade disk is required for each calibrator to be upgraded. Download from your PC to your calibrator using the serial cable originally supplied with your Fluke 744 Calibrator. Elapsed time for the process will be about 8 minutes. After the upgrade is complete, your calibrator will indicate “Version 2.5” at start up.
The 2.5 upgrade is available from your regular Fluke dealer or representative as Fluke 744V20. For an available five-pack, ask for Fluke-744V2V.
Pressure Modules
Covers virtually any pressure application including gage, differential, dual (compound), absolute, and vacuum.
Display pressure readings in any of 10 different pressure units you specify in the calibrator setup.
Rugged urethane molded cases protect the modules from rough handling and harsh conditions.
Features internal temperature compensation from 0º to 50º C for full accuracy performance.
Includes NIST-traceable calibration certificate.
Modules can be calibrated locally, helping to control costs.
Automated Procedures
Allow you to quickly set up powerful, automated calibration procedures for linear transmitters, DP flow transmitters, and one- and two-point limit switches. Simply select the appropriate measure and/or source functions and fill out the procedure template. The 740 Series does the rest. It quickly performs the test, calculates the errors, and displays the final results, highlighting out of tolerance points.
Custom Units
Enable you to map one unit to another, such as mV to ºC or ºF. Allows you to use the Fluke 740 Series with millivolt output accessories such as the Fluke 80T-IR Temperature Probe, and to document tests using non-supported units such as parts per million or revolutions per minute.
User-entered Values
Enables technicians to record calibration results that were sourced and/or measured by other devices such as panel meters or readout-only devices.
Limit Switch Calibration
Procedures perform fast, automated calibration of one and two-point limit switches for voltage, current, temperature, and pressure.
Differential Pressure Flow Instrument Calibration
Routines use a square root function to directly calibrate DP flow instruments.
Additional Features
Multifunctional
Calibrate temperature, pressure, voltage, current, resistance, and frequency. Since it both measures and sources, you can troubleshoot and calibrate all with one rugged tool.
Powerful, yet easy to use
The easy-to-follow menu-driven display guides you through any task. Get up to speed in minutes, not days. Programmable calibration routines enable you to create and run automated as-found/as-left procedures to ensure fast, consistent, calibrations.
Records and documents results
To support your ISO-9000 or regulatory standards the Fluke 744 captures your calibration results, eliminating the need to juggle a pen and pad in the field. The RS-232 interface lets you transfer the results to a PC, thus saving the time of having to manually transcribe them when you return to the shop.
Truly hand-held
Small enough to fit easily into a tool bag and to use in tight spaces. Runs an entire shift on a rechargeable NiMH battery pack.
Rugged and reliable
Count on Fluke's rugged design to deliver top accuracy and reliability in harsh environments. Overmolded urethane case stands up to rough handling in industrial environments.
Bright white display
Lets you read your results in any kind of light.
Soft keys
Provide one-touch access to enhanced functions such as task lists, automated procedures, scaling, min/max, stepping and ramping, and review memory.
Three operating modes
Measure, Source, or simultaneous Measure/Source, - enable technicians to troubleshoot, calibrate, or maintain instrumentation with just one tool.
Multi-lingual interface
Displays instructions in English, French, German, Spanish, and Italian.
Built-in algebraic calculator
With four functions-plus square root-stores, recalls, and performs calculations required for setting up instruments or evaluating data in the field. Use it to set the source function to a calculated value. There's no need to carry a pencil and paper or a separate calculator.
Programmable measurement delay
Inside automated procedures permits calibrating instruments that respond slowly.
Specifications:
Measurement Accuracy
Voltage DC
110.000 mV
0.025%+0.015% *
1.10000 V
0.025%+0.005% *
11.0000 V
0.025%+0.005% *
110.000 V
0.05%+0.005% *
300.00 V
0.05%+0.005% *
Voltage AC
20 to 40 Hz
2% + 10
40 to 500 Hz
0.5% + 5
500 to 1 kHz
2% + 10
1 kHz to 5 kHz
10% + 20
Ranges:
1.1000, 11.000, 110.00, 300V
Current DC
30.000 mA
0.01% + 0.015% *
110.00 mA
0.01% + 0.015% *
Resistance
11.000 Ω
0.05% + 50 mΩ
110.00 Ω
0.05% + 50 mΩ
1.1000 kΩ
0.05% + 500 mΩ
11.000 kΩ
0.1% + 10 Ω
Frequency
1.00 to 109.99 Hz
0.05 Hz
110.0 to 1099.9 Hz
0.5 Hz
1.100 to 10.999 kHz
5 Hz
11.00 to 50.00 kHz
50 Hz
Pressure
Accuracy
from 0.025% of range using any of 29 pressure modules.
Modules available for differential, gage, vacuum, absolute, dual and high pressure.
(for detailed specifications refer to pressure modules in options and accessories)
Note
*
(% of reading + % of full scale)
Source Accuracy
Voltage DC
110.000 mV
0.01%+0.005% *
1.10000 V
0.01%+0.005% *
15.0000 V
0.01%+0.005% *
Current DC
22.000 mA (Source)
0.01%+ 0.015% *
22.000 mA (Simulate)
0.02% + 0.03% *
Resistance
11.000 Ω
0.01% + 20 mΩ
110.00 Ω
0.01% + 40 mΩ
1.1000 kΩ
0.02% + 500 mΩ
11.000 kΩ
0.03% + 5Ω
Frequency
0.00 to 10.99 Hz
0.01 Hz
11.00 to 109.99 Hz
0.1 Hz
110.0 to 1099.9 Hz
0.1 Hz
1100 to 21999 Hz
2 Hz
22.000 to 50.000 kHz
5 Hz
Note
*
(% of reading + % of full scale)
RTDs and Thermocouples
Measure Accuracy:
10 Ω Cu (427):
2 °C
100 Ω Pt (3916):
0.3 °C
100 Ω Pt (3926):
0.3 °C
100 Ω Pt (385):
0.3 °C
200 Ω Pt (385):
0.3 °C
500 Ω Pt (385):
0.3 °C
1000 Ω Pt (385):
0.3 °C
120 Ω Ni (672):
0.3 °C
note:
For 2-and 3-wire measurement, add 0.4°C
E:
0.3 °C
N:
0.5 °C
J:
0.3 °C
L:
0.3 °C
K:
0.3 °C
T:
0.3 °C
U:
0.3 °C
B:
0.9 °C
R:
1.0 °C
S:
0.9 °C
C:
0.6 °C
BP:
1.2 ºC
XK:
0.4 ºC
note:
Accuracy with external cold junction, for internal junction add 0.2 °C
Source Accuracy:
10 Ω Cu (427):
1 °C
100 Ω Pt (3916):
0.1 °C
100 Ω Pt (3926):
0.1 °C
100 Ω Pt (385):
0.1 °C
200 Ω Pt (385):
0.1 °C
500 Ω Pt (385):
0.1 °C
1000 Ω Pt (385):
0.1 °C
120 Ω Ni (672):
0.1 °C
note:
For 2-and 3-wire simulation, add 0.4 °C
E:
0.2 °C
N:
0.3 °C
J:
0.2 °C
L:
0.2 °C
K:
0.3 °C
T:
0.3 °C
U:
0.3 °C
B:
0.8 °C
R:
0.9 °C
S:
0.9 °C
C:
0.6 °C
BP:
0.5 ºC
XK:
0.4 ºC
note:
Accuracy with external cold junction, for internal junction add 0.2 °C
Technical Data
Data Log Functions
Measure functions:
Voltage, current, resistance, frequency, temperature, pressure
Reading rate:
1, 2, 5, 10, 20, 30, or 60 readings/minute
Maximum record length:
8000 readings (7980 for 30 or 60 readings/minute)
Ramp Functions
Source functions:
Voltage, current, resistance, frequency, temperature
Rate:
4 steps/second
Trip detect:
Continuity or voltage (continuity detection not available when sourcing current)
Loop Power Function
Voltage:
Selectable, 24 V or 28 V
Accuracy:
5%
Maximum current:
22 mA, short circuit protected
Maximum input voltage:
30 V DC
Step Functions
Source Functions
Voltage, current, resistance, frequency, temperature
Manual Step
Selectable step, change with arrow buttons
Autostep
Fully programmable for function, start delay, stepvalue, time per step, repeat
Environmental Specifications
Operating Temperature
-10 °C to +50 °C
-20 °C to +50 °C *
Storage Temperature
-20 °C to +60 °C
Dust/water resistance
Meets IP52, IEC 529
Operating Altitude
2800 m
Note
*
Except frequency and AC
Safety Specifications
Agency Approvals
CAN/CSA C22.2 No 1010.1-92, ASNI/ISA S82.01-1994, UL3111, and EN610-1:1993
Mechanical & General Specifications
Size
130 x 236 x 61 mm (5.1“ x 9.3” x 2.4”)
Weight
1.4 kg (3 lbs., 1oz.)
Batteries
NiMH:
7.2V, 3.5 Ah
Battery Life
>10 hours typical
Battery Replacement
Via snap-shut door without opening calibrator; no tools required
Side port connections
Pressure module connector
RS-232 connector for PC interface cable and for HART communication cable
Connection for optional battery eliminator
Data storage capacity
1 week of calibration results
90 day specifications
The standard specification interval for the 744 is 1 and 2 years.
Typical 90 day measurement and source accuracy can be estimated by
dividing the one year "% of reading" or "%of output" specifications by 2.
Floor specifications, expressed as "% of full scale" or
"counts" or "ohms" remain constant.
For full Fluke 744 product specifications, please click here:
Fluke 744
Please check our Huge Inventory with savings of up to 80% off of retail on Cat5/5e/6 LAN Cable Certifiers and Fiber Optic OTDR's, Fusion Splicers, CATV Meters, Fiber Optic Kits, Sources, Meters, Tools, Network Analyzers and much more. Here is a Link to our
Ebay Test Equipment Store
. All of our Test Equipment is backed with a Full Warranty and unbeatable customer support & service. Please don't hesitate to
contact us
for a Quote on Something you don't see in our inventory, sometimes we have items that may have not been listed or processed yet.
Test Equipment Store Offers a wide range of Refurbished Telecom/ Datacom Tools and Test Measurement Equipment. Which includes Fiber Optic Test and Splicing tools, Fusion Splicers, OTDRs, Copper and Fiber Cable Certifiers, CATV Test Equipment, Cable and Antenna Analyzers, Network Analyzers and much more!
We carry a large inventory of quality refurbished and used test equipment from all the major manufacturers. If you are looking for multiple quantities or if we don't have a listing for a particular item that you are looking for. Please contact us as it may be fresh inventory waiting to be listed or we'll be glad to find it for you at the best price possible and put up an eBay listing for you!
We Ship World Wide!
We will attempt to ship your item(s) within 24 hours after payment has been received. To get a real-time shipping quote to your destination, enter your country and zip / postal code information into the shipping calculator and click "Get Rate".
Many countries impose their own customs, duties, tariffs, taxes, etc. on items being shipped from a foreign country. We do not cover those cost's and we recommend that you contact your countries customs agency for that information.
We Offer Multiple Quantity Price & Shipping Discounts, Email Us If You Are Interested In Larger Quantities.
We accept credit card payment transactions via the online checkout system! The checkout process is designed so that it communicates with the merchant to confirm that payment has been made and cleared. Other methods of payment are outlined through the online checkout process. Winning bidders must contact us within 3 days after auction close if special payment arrangements are needed.
Your payment is expected within 5 days after the auction close. Unpaid auctions will be forfeited after 5 days of the auction close and the Item(s) will be relisted for sale.
Items will be shipped within 24 hours (1 Business Day) upon receipt of payment from the winning bidder. (Certain orders may take longer for processing due to comprehensive final service inspections)
A Shipment Tracking number(s) will be provided to inform Buyers of their expected ETA (Estimated Time of Arrival). Tracking number(s) will be provided the same day as order shipment.
Thank you
ALL MAJOR CREDIT CARDS & PayPal ACCEPTED
Sell Smarter with Kyozou.
Inventory and Ecommerce Management
